 Black friday 50% Off:
Dollar Tree cupcake stands can turn any dessert table into a mini showpiece—fast. Mix a few single pedestals with a simple tiered tray, customize finishes to match your palette, and line decorated surfaces with doilies or plates. Below, you’ll find creative, budget‑friendly builds, styling tricks, and ways to scale up your display for bigger events.
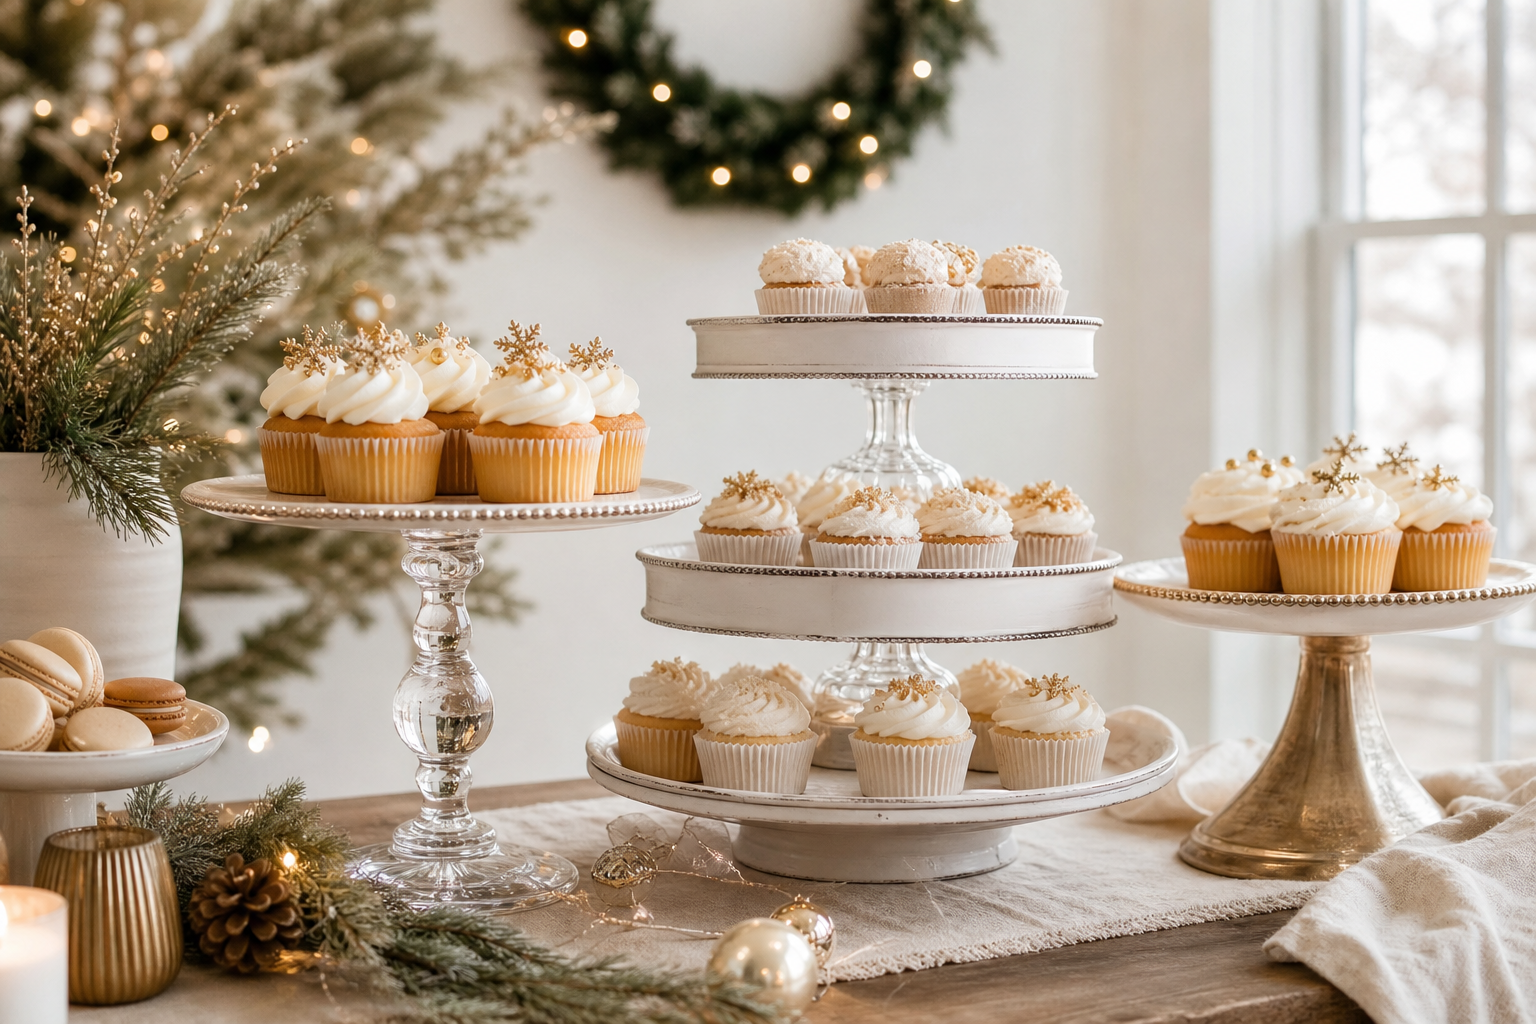
Key Takeaways
- Dollar Tree supplies make charming single or multi-tier cupcake stands with simple glue-and-stack builds.
- Mix heights, repeat colors/finishes, and leave breathing room to create a polished dessert display.
- Use liners, wrappers, doilies, or a separate plate when a DIY surface is painted or decoupaged.
- For larger parties, a modular tiered platform can be configured for dessert and cake display without replacing small stands.
Quick Inspiration: Dollar Tree Cupcake Stand Magic
Affordable doesn’t have to look basic. A thrifted-looking plate atop a glass candlestick, a three-tier pizza-pie-cake pan tower, or an acrylic plate elevated by a playful shaker stem can instantly lift cupcakes, macarons, or mini tarts. Start with one pedestal for your focal treat, then echo the color and trim across a few low risers for a cohesive spread.
What Makes a Dessert & Cake Display Stand Out?
A memorable dessert table balances beauty with reachability. Event-styling guides recommend:
- Height zoning: Place a tall focal element (cake or statement riser) toward the back/center, mid‑heights in the middle, and low items in front so guests see and reach everything easily.
- One clear focal point: Build the arrangement around a hero item such as a cake, macaron tower, or tall floral.
- Cohesion: Repeat a palette or finish (e.g., black/white, gold, or ‘marble’ looks). Matching or coordinated stands help the whole table read as intentional.
- Guest flow and visibility: Ensure nothing important hides behind a riser. Walk the table from guest angles to check sightlines.
- Negative space: Cluster desserts in small groups and leave room between them for a boutique-style look.
Creative Dollar Tree Cupcake Stand Ideas
1) Classic Plate + Candlestick Pedestal
What you’ll use: A Dollar Tree dinner plate (or charger) and a glass candlestick. Attach with glue to create a simple single-tier cupcake stand.
- Finish options: Chalk-paint distressing, metallic spray, or decoupage with scrapbook paper and rhinestone trim.
- Food-surface note: When a stand is painted or decoupaged, place cupcake wrappers, a doily, parchment, or a separate clear plate on top as a barrier.
- Adhesive tips: E6000 is commonly used for stronger bonds; hot glue works for a quick, temporary set.
2) Tiered Pizza/Pie/Cake Pan Tower
Stack a pizza pan (bottom), pie pan (middle), and cake pan (top) with glass candleholders or bowls as spacers to create a two‑ or three‑tier tray.
- Style it: Spray in matte black or a black‑and‑white distressed finish. Add a thin beaded trim on the rims for a farmhouse vibe.
- Use cases: Perfect for mini cupcakes, cookies, and favor bags at birthdays or showers.
- Build note: Many DIYers tack with hot glue, then add E6000 for a longer‑cure bond.
3) Acrylic Plate + Shaker Stem (Playful Accent Stand)
Create a whimsical pedestal by pairing a clear acrylic plate with a small clear container or shaker as the stem—fill the stem with beads or sprinkles to match your theme.
- Good for: Colorful birthdays, candy bars, or kids’ dessert tables.
- Finish touch: Wrap the stem with ribbon or add a bow at the base for extra polish.
4) Charger + Flipped Goblet or Margarita Glass
Flip a glass goblet or margarita glass to serve as a sturdy pedestal under a charger or dinner plate.
- Style idea: Keep the glass clear for a modern look, or lightly frost it with glass spray.
- Barrier: Place a paper doily or plate on top if the surface is decorated.
5) Multi-Stand Mix for Visual Rhythm
Use several single pedestals instead of one large tier. Arrange heights from back to front and vary plate sizes to create movement.
- Cohesion cues: Repeat one detail—like gold trim, black rims, or half‑bead edging—across every stand.
- Table mapping: Put the showstopper (cake or tallest pedestal) at center-back, then step down to mid and low pieces.
6) Seasonal and Themed Makeovers
- Spring shower: Soft chalk‑paint pastels, silk florals on the base, and ribbon bows.
- Holiday sparkle: Metallic spray, rhinestone “bling” on the rims, and a few ornament picks around the base of each stand.
- Rustic birthday: Distressed white stands with wood half‑beads; add kraft labels or mini chalkboard tags.
General DIY notes
- Adhesives seen in tutorials: E6000 for long‑cure strength; hot glue for fast, temporary tacking.
- Surfaces: Painted/decoupaged finishes are decorative. Keep desserts in wrappers or add a plate/liner between food and decorated tops.
- Inventory reality: Discount‑store stock varies by location and season; adapt your plan to what you find.
Elevating Your Display: Modular Platforms and Beyond
When your treat table grows beyond a few small pedestals, a modular, multi‑tier platform gives you room to style height, spacing, and flow across one unified structure.
As one example, Momentree’s Holiday Display Tree is a reusable modular display platform with six round display tiers and a black metal center structure on a cross‑shaped base with rolling wheels. It can be configured for dessert and cake display applications, and you can assemble fewer tiers when you want a shorter setup and more tiers when you’re planning a larger presentation. Decorations can change without changing the platform’s core identity, and the stand disassembles for flat‑pack storage when the party’s over.
- Practical note: It’s a display platform, not a conventional food‑contact cake stand. If placing treats directly on tiers, use plates, trays, or liners on top.
- Context fit: Use small Dollar Tree pedestals for intimate gatherings; consider a modular platform for weddings, milestone birthdays, or dessert buffets where you want layered height and a cohesive focal point.
Explore the Holiday Display Tree
- See the modular platform configured for dessert and cake display: Holiday Display Tree
Expert Tips for Showstopping Dessert Tables
- Map your heights: Use a tall focal point at the back/center, mid‑levels in the middle, and low items in front to keep everything visible and accessible.
- Design around a hero: Choose the cake, a macaron tower, or a striking riser first—then echo its color and finish across other stands.
- Repeat finishes: A consistent palette (e.g., black/white, gold, or acrylic/clear) ties DIY and store‑bought pieces together.
- Leave breathing room: Cluster desserts and create negative space—crowded tables look flat; curated spacing feels luxe.
- Check guest flow: Walk the table from guest angles; don’t hide smaller sweets behind tall risers.
- Label smartly: Simple tags or a mini menu help guests choose and can flag allergen‑friendly items.
- Time the set: Stage décor and empty stands early; add temperature‑sensitive desserts closer to serving time, especially outdoors.
Momentree Expert Tip
If you’re using a modular platform like the Holiday Display Tree for a dessert and cake display configuration:
- Assemble only as many tiers as you need; the tier count controls assembled height and display levels.
- Before event use, secure the structure firmly and keep it indoors or in covered outdoor areas—away from open flames or high heat.
- Do not exceed the platform’s weight guidelines. After the event, remove decorations before storing the stand flat in a dry area and dust it with a soft cloth between uses.
Frequently Asked Questions
What are some budget-friendly cupcake stand ideas using Dollar Tree items?
- Plate + candlestick single pedestal
- Three‑tier pizza/pie/cake pan tower with glass candleholders as spacers
- Acrylic plate on a shaker‑filled stem for a playful accent
- Charger on a flipped goblet or margarita glass for a quick pedestal
Decorate with chalk paint, metallic spray, scrapbook paper decoupage, rhinestone trim, or wood half‑beads.
How can I decorate a Dollar Tree cupcake stand for a birthday party?
Coordinate to your palette: spray stands metallic for glam, distress white for rustic, or use pastel chalk paints for kid parties. Add ribbon bows, mini florals, or themed picks at the base. If you decoupage or paint, set cupcakes in wrappers or place a doily/plate on top as a barrier.
Can I stack or combine different Dollar Tree stands for a tiered display?
Yes—many DIYers stack pizza, pie, and cake pans with candleholders or bowls between tiers. Hot glue can tack pieces in place while a long‑cure adhesive sets. Always test stability before loading desserts and keep heavier items on lower levels.
What other Dollar Tree products work well with cupcake stands for dessert tables?
Look for trays, chargers, glass bowls/vases, candlesticks, goblets, salt/pepper shakers (as stems), ribbon, faux florals, rhinestone trim, scrapbook paper, doilies, and mini chalkboard labels.
Are there creative alternatives to cupcake stands for showcasing treats?
Try lucite/acrylic risers, shallow crates under linens for hidden lift, tiered trays, cake drums covered in coordinating paper (with a food barrier), or a modular tiered platform for larger spreads.
How do I match my dessert table display to a party theme?
Pick one focal color/finish and repeat it across stands and desserts. Echo shapes and textures—e.g., round pedestals with macarons and mousse cups. Use a right‑sized backdrop and soft lighting to frame the table without overpowering it.
Can modular display platforms like Momentree be used for dessert tables?
Yes. The Holiday Display Tree is a reusable modular display platform that can be configured for dessert and cake display. Assemble fewer tiers for a shorter setup or more tiers for a layered, statement dessert feature. Use plates or liners on top of tiers for treats.
Are Dollar Tree cupcake stands sturdy enough for heavy cakes?
DIY tutorials rarely specify weight limits. For heavier cakes, use a dedicated cake stand or keep it on the lowest, widest tier of a DIY build. Choose strong adhesives for permanent assemblies, and always load and test gradually before the event.
Related Guides
- Learn about modular tiered display systems: Momentree Shop
- More ways to style a dessert and cake display: Holiday Display Tree
Sources and Further Reading
- Dengarden: DIY Dollar Tree acrylic cake stand with shaker stem inspiration — adhesive notes and trend context. https://dengarden.com/news/diy-dollar-tree-cake-stand-2
- Mod Podge Rocks: Dollar store cake stand DIY (decoupage + barrier guidance). https://modpodgerocksblog.com/dollar-store-diy-cake-stand/
- Mod Podge Rocks: DIY cupcake stand from discount supplies (adhesive and barrier tips). https://modpodgerocksblog.com/diy-cupcake-stand/
- Sew Very Crafty: Dollar Tree tiered tray tutorial (pizza/pie/cake pans + candleholders). https://sewverycrafty.com/how-to-make-a-dollar-tree-tiered-tray/
- Thrifty Northwest Mom: Simple DIY cake stands (charger + glass base; three‑tier build). https://www.thriftynorthwestmom.com/simple-diy-cake-stands-you-can-make-yourself/
- Plinths NY: How to build a tiered buffet display like a pro (height zoning, visibility). https://plinthsny.com/blogs/news/tiered-buffet-display-professional-guide
- The Knot: Wedding dessert table ideas (focal points, lucite levels, signage/timing). https://www.theknot.com/content/wedding-food-buffet-dessert
- Food Network: Dessert board variety and texture tips. https://www.foodnetwork.com/holidays-and-parties/packages/everyday-celebrations/how-to-make-a-dessert-board


